Get Started with Buffer
Buffer is a social sharing software that allows you to schedule social media posts to all your different social profiles – Twitter, Facebook, LinkedIn, Pinterest, etc.
It has a free version that allows you to have up to 10 posts scheduled for up to 3 different social media profiles. That is enough to do what we need today, but if you need more in the future, the Pro plan is $15/mo and allows you to do 8 profiles and schedule up to 100 posts at a time.
Setting Up an Account
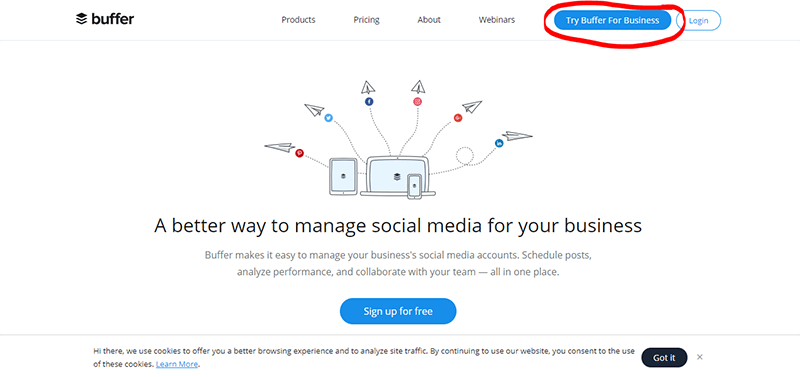
STEP 1: Go to Buffer.com
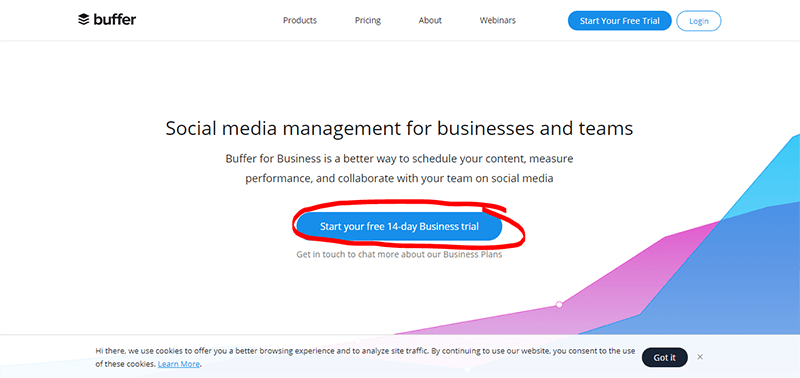
STEP 2: Click on the Free Trial. This will start a free trial of the “Small Business” plan which is normally $99/mo, but you can downgrade it to the Free plan afterwards. You don’t need a credit card to sign up.
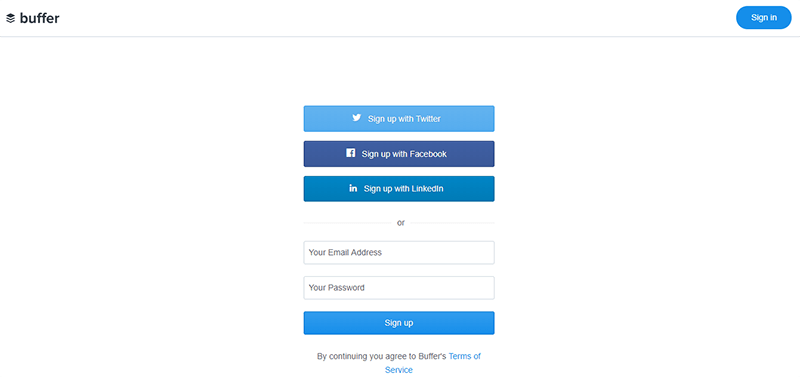
STEP 3: Sign in however best suits you.

STEP 4: Now you are in Buffer! Let’s go ahead and get started by connecting some social media accounts.
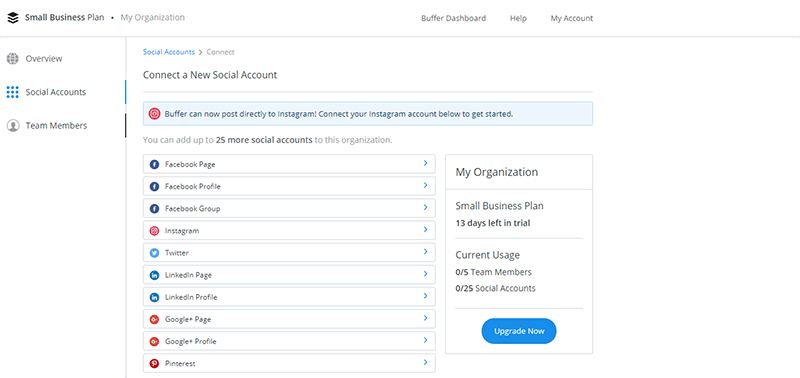
STEP 5: Again, we are in the small business plan at the moment and haven’t downgraded to the free version. The free version only allows 3 social media profiles. The Pro at $15/mo allows 8 if you need more. For now, I’ve picked three that are most important to me. Your business page must be one of them! Connect whichever other two you like!
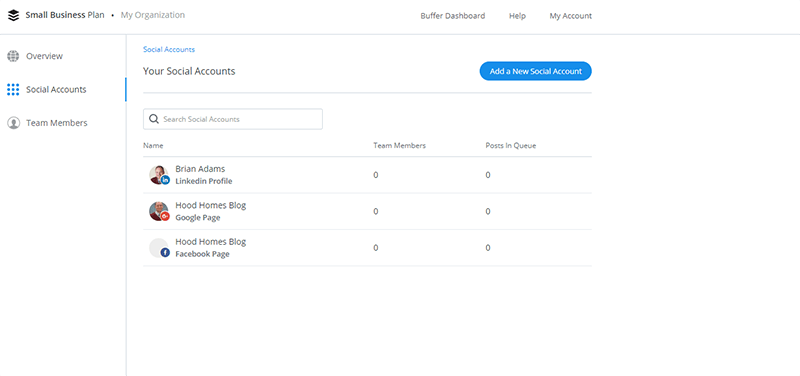
STEP 6: Here are my own three accounts connected up for my website. Now, feel free to explore and play around. You’ve done what you need to on Buffer, so now to Facebook…
Sharing Content
Go back to your Business Facebook’s Pages Feed. Check out the posts a little bit closer, and you will see the Buffer sharing icon.
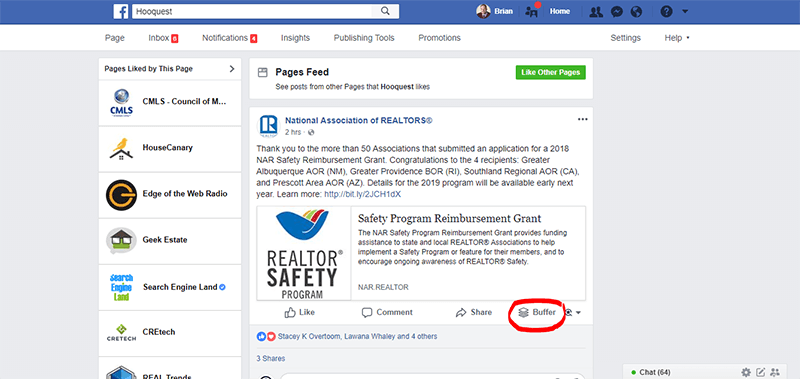
STEP 1: See that tiny little Buffer symbol now on your posts? That is there because we linked our Buffer and Facebook business page. Go ahead and click on it to swiftly share your curated piece of content!
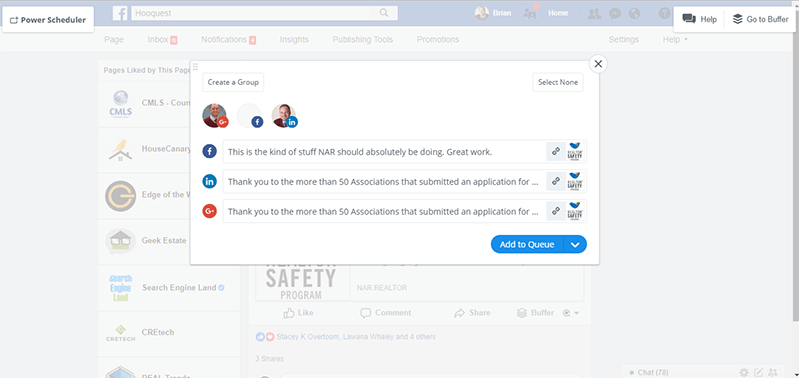
STEP 2: There are my three social media channels again! I can click on the different messages sent to each and edit them for the specific social media channel or style. Make sure that whichever social media profiles you want it going to are checked or unchecked. For example, you might want to share something on Pinterest but not on LinkedIn. If not sharing, they are grayed out. When done making any edits, click “Add to Queue”
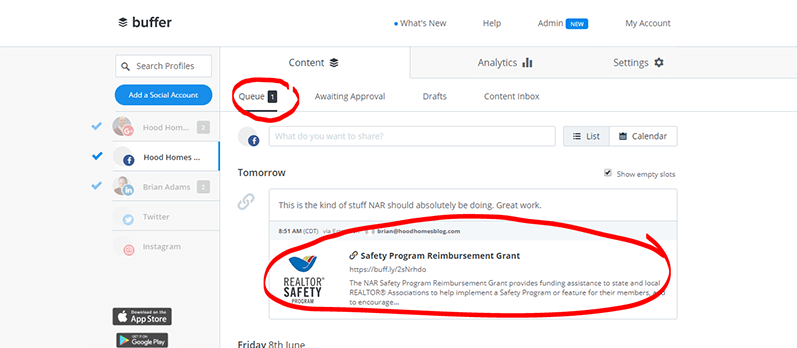
STEP 3: Technically, there is no step 3. You’re done! That’s all you needed to do. But just to check it’s working, I went back to Buffer. Sure enough, there is the post, ready to go out tomorrow on the schedule I set in Buffer. Instead of being share right away, these will be released slowly, on schedule, over time. That way I am not sharing 10 different articles at 1 AM in the morning which is the only time I have available to look up stuff to share.
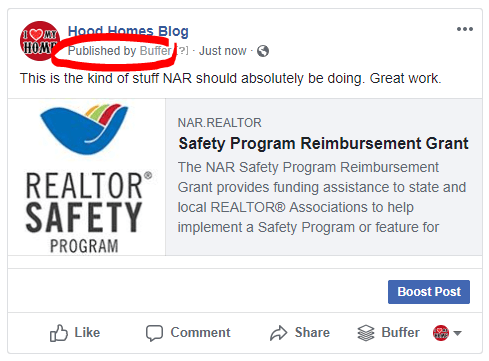
STEP 4: Published! Again, this isn’t really a step. This will happen automatically after you complete Step 2. But good to check in and make sure it is working. This was published to my business page without my having to do anything. You can see it notes that it came from Buffer.
Note that even though we are on the Facebook business page when sorting through what we want to share, we can share things to either our personal Facebook or business Facebook page. That allows you to share more fun or personal content on your personal page, while keeping your business page more business-like, or even just for your own content.
Another Method
You can also use the Buffer Chrome extension to queue up any page you happen to be reading at any given time.
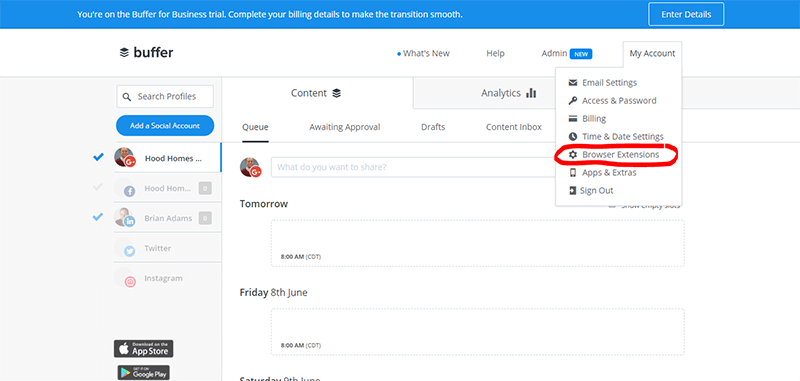
STEP 1: Install the Buffer Chrome Extension. This is going to be a neat little app that makes sending articles to Buffer super simple, and that we will go more into in a moment. Click on the Browser Extensions button.
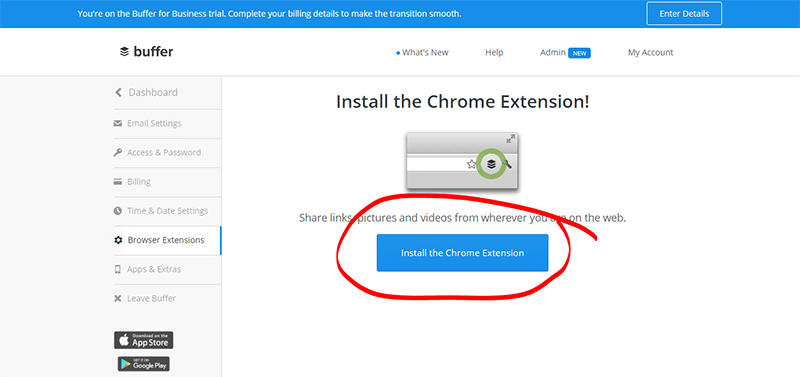
Step 2: And install the Chrome extension.
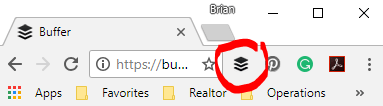
Now you should see a little Buffer icon next to your web address bar. That is great! Though that is not the button we will be using most often. Now, your Facebook posts also have those little buttons next to the articles, which we will get to in a moment.